从自定义通知栏和桌面小部件到深入理解RemoteViews

直观地,从RemoteViews名字来看,它类似与一个远程的View,提到远程必然会涉及跨进程的通信。也就是说RemoteViews提供一组基础的操作用于跨进程更新它的界面。RemoteViews在Android中的使用场景有两种,一种是自定义的通知栏,另外一种是桌面小部件。

RemoteViews实际应用

通知栏

在Android应用开发中,通知栏是一个很重要的UI交互。其原理是通过调用NotificationManager的notify方法来实现的。最基本的实现是使用API提供的默认布局,例如

1
2
3
4
5
6
7
8
9
10
11
12
13
14
15
16
17
private void sendNotification() {
Intent intent = new Intent(this, TransitionActivity.class);
PendingIntent pendingIntent = PendingIntent.getActivity(this, 0, intent, 0);
Notification notification = new NotificationCompat.Builder(this)
.setTicker("This is tickerText")
.setSubText("This is subText")
.setContentText("This is ContentText")
.setContentTitle("This is ContentTitle")
.setAutoCancel(true)
.addAction(R.drawable.ic_no, "cancel", pendingIntent)
.addAction(R.drawable.ic_yes, "confirm", pendingIntent)
.setSmallIcon(R.mipmap.ic_launcher)
.setLargeIcon(BitmapFactory.decodeResource(getResources(), R.drawable.luffy))
.build();
NotificationManager manager = (NotificationManager) getSystemService(NOTIFICATION_SERVICE);
manager.notify(1, notification);
}

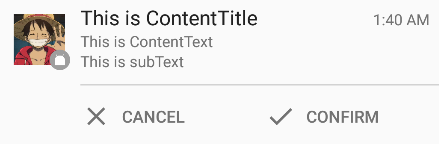
在Android6.0系统上可以得到扩展后的通知如下,关于更详细的Notification开发不是本篇文章讨论的重点,故不做讨论。


为了满足个性化需求,我们会用到一些复杂布局的通知,这时候就需要我们自定义布局了。对于这类通知最常见的就是下载进度通知,如下图所示:


下面就用代码模拟迅雷下载通知,首先是通知布局

1
2
3
4
5
6
7
8
9
10
11
12
13
14
15
16
17
18
19
20
21
22
23
24
25
26
27
28
29
30
31
32
33
34
35
36
37
38
39
40
41
42
43
44
45
46
47
48
49
50
51
52
53
54
55
56
57
58
59
60
61
<?xml version="1.0" encoding="utf-8"?>
<RelativeLayout xmlns:android="http://schemas.android.com/apk/res/android"
android:layout_width="match_parent"
android:layout_height="match_parent">
<ImageView
android:id="@+id/icon"
android:layout_width="40dp"
android:layout_height="40dp"
android:layout_alignParentStart="true"
android:layout_centerInParent="true"
android:layout_margin="12dp"
android:src="@mipmap/ic_xunlei"/>
<LinearLayout
android:id="@+id/content"
android:layout_width="match_parent"
android:layout_height="wrap_content"
android:layout_centerInParent="true"
android:layout_marginBottom="4dp"
android:layout_marginEnd="4dp"
android:layout_marginStart="4dp"
android:layout_marginTop="4dp"
android:layout_toLeftOf="@+id/btn"
android:layout_toRightOf="@+id/icon"
android:orientation="vertical">
<TextView
android:layout_width="wrap_content"
android:layout_height="wrap_content"
android:text="一个任务正在下载"
android:textColor="#A39F9D"
android:textSize="13sp"/>
<ProgressBar
android:id="@+id/progressbar"
style="@style/customProgressbar"
android:layout_width="match_parent"
android:layout_height="wrap_content"
android:layout_marginBottom="2dp"
android:layout_marginTop="2dp"/>
<TextView
android:id="@+id/download_speed"
android:layout_width="wrap_content"
android:layout_height="wrap_content"
android:text="总速度:1.0MB/s"
android:textColor="#7C7C7C"
android:textSize="11sp"/>
</LinearLayout>
<TextView
android:id="@+id/btn"
android:layout_width="60dp"
android:layout_height="25dp"
android:layout_alignParentEnd="true"
android:layout_centerInParent="true"
android:layout_margin="8dp"
android:background="@drawable/bg_button"
android:gravity="center"
android:text="会员加速"
android:textColor="#fff"
android:textSize="11sp"/>
</RelativeLayout>

布局中为了美化progressbar缩小了progress的高度和颜色,使得通知中的所有色调都符合产品的统一色调。接下来就是使用RemoteViews来为Notification加载自定义的通知了。

1
2
3
4
5
6
7
8
9
10
11
12
13
14
15
16
17
18
private void customNotification() {
Notification notification = new Notification.Builder(this)
.setSmallIcon(R.mipmap.ic_xunlei)
.setWhen(System.currentTimeMillis())
.setAutoCancel(true)
.setTicker("Hello world")
.build();
Intent intent = new Intent(this, TransitionActivity2.class);
PendingIntent pendingIntent = PendingIntent.getActivity(this, 0, intent, PendingIntent.FLAG_UPDATE_CURRENT);
RemoteViews remoteViews = new RemoteViews(getPackageName(), R.layout.xunlei_notify);
remoteViews.setTextViewText(R.id.download_speed, "总速度:1.0MB/s");
remoteViews.setProgressBar(R.id.progressbar, 100, 78, false);
remoteViews.setOnClickPendingIntent(R.id.btn, pendingIntent);
notification.contentView = remoteViews;
NotificationManager manager = (NotificationManager) getSystemService(NOTIFICATION_SERVICE);
manager.notify(2, notification);
}

remoteViews赋予notification.contentView后Notification的视图就将使用RemoteViews来填充了,值得注意的是为remoteViews中子控件设置属性时,不会通过findViewById的形式得到子控件对象再去设置属性而是通过RemoteViewsAPI方法来设置相应控件的属性值,以下是RemoteViews API中常用于设置子控件的方法:

  • setTextViewText(int viewId, CharSequence text) 为TextView设置文字内容
  • setImageViewResource(int viewId, int srcId) 为ImageView设置res
  • setOnClickPendingIntent(int viewId, PendingIntent pendingIntent) 为控件添加点击事件
  • setProgressBar(int viewId, int max, int progress, boolean indeterminate) 设置ProgressBar
  • setViewVisibility(int viewId, int visibility) 视图可见性

RemoteViews没有对所有的控件都提供设置的方法(RemoteViews所支持的View请移步第二部分),所以在开发中尽量避免在通知栏中使用复杂的控件。为什么RemoteViews框架不提供一个findViewById方法来获取每个子View呢?这样也省得调用remoteviews提供的残缺方法了,这里先挖个坑,稍后再填。

桌面小部件

广播android.content.BroadcastReceiver子类中包含android.appwidget.AppWidgetProvider类,该类是实现桌面小部件的核心类。该类的核心就是发送广播,接收广播,更新小部件,这时候想一想安卓桌面上的时钟,是不是突然开窍了,通过每一秒都来接收广播达到实时更新的效果。

对于开发桌面小部件一般可以分为以下几个步骤:

1.构造小部件的桌面布局。这里模仿网易云音乐并且模拟实现歌曲进度条和红心的更新操作,最后实现的效果如下


1
2
3
4
5
6
7
8
9
10
11
12
13
14
15
16
17
18
19
20
21
22
23
24
25
26
27
28
29
30
31
32
33
34
35
36
37
38
39
40
41
42
43
44
45
46
47
48
49
50
51
52
53
54
55
56
57
58
59
60
61
62
63
64
65
66
67
68
69
70
71
72
73
74
75
76
77
78
79
80
81
82
83
84
85
86
87
<?xml version="1.0" encoding="utf-8"?>
<LinearLayout xmlns:android="http://schemas.android.com/apk/res/android"
android:layout_width="match_parent"
android:layout_height="100dp"
android:background="@color/bg_widget"
android:orientation="horizontal">
<ImageView
android:id="@+id/img"
android:layout_width="80dp"
android:layout_height="80dp"
android:layout_gravity="center_vertical"
android:layout_margin="8dp"
android:src="@drawable/img"/>
<LinearLayout
android:layout_width="match_parent"
android:layout_height="wrap_content"
android:layout_gravity="center_vertical"
android:layout_marginBottom="8dp"
android:layout_marginEnd="8dp"
android:layout_marginTop="8dp"
android:orientation="vertical">
<RelativeLayout android:layout_width="match_parent"
android:layout_height="wrap_content">
<ImageView
android:id="@+id/music_icon"
android:layout_width="15dp"
android:layout_height="15dp"
android:src="@drawable/desk_logo"/>
<TextView
android:layout_width="wrap_content"
android:layout_height="wrap_content"
android:layout_centerInParent="true"
android:layout_marginStart="4dp"
android:layout_toEndOf="@+id/music_icon"
android:text="惊天动地-金玟岐"
android:textColor="#fff"
android:textSize="13sp"/>
</RelativeLayout>
<ProgressBar
android:id="@+id/music_progress"
style="@style/musicProgress"
android:layout_width="match_parent"
android:layout_height="wrap_content"
android:layout_marginBottom="8dp"
android:layout_marginTop="8dp"/>
<RelativeLayout android:layout_width="match_parent"
android:layout_height="wrap_content">
<ImageView
android:id="@+id/desk_switch"
android:layout_width="25dp"
android:layout_height="25dp"
android:src="@drawable/desk2_switch"/>
<LinearLayout
android:layout_width="wrap_content"
android:layout_height="wrap_content"
android:layout_toLeftOf="@+id/music_love"
android:layout_toRightOf="@+id/desk_switch"
android:gravity="center"
android:orientation="horizontal">
<ImageView android:layout_width="30dp"
android:layout_height="30dp"
android:src="@drawable/desk2_pre"/>
<ImageView
android:id="@+id/music_play_pause"
android:layout_width="35dp"
android:layout_height="35dp"
android:layout_marginEnd="8dp"
android:layout_marginStart="8dp"
android:src="@drawable/desk2_play"/>
<ImageView android:layout_width="30dp"
android:layout_height="30dp"
android:src="@drawable/desk2_next"/>
</LinearLayout>
<ImageView
android:id="@+id/music_love"
android:layout_width="28dp"
android:layout_height="28dp"
android:layout_alignParentEnd="true"
android:src="@drawable/desk_love"/>
</RelativeLayout>
</LinearLayout>
</LinearLayout>

该文件命名为res/layout/music_widget.xml

2.配置小部件信息。在res/xml/appwidget_provider_info.xml配置如下

1
2
3
4
5
6
7
<?xml version="1.0" encoding="utf-8"?>
<appwidget-provider xmlns:android="http://schemas.android.com/apk/res/android"
android:initialLayout="@layout/music_widget"
android:minHeight="100dp"
android:minWidth="300dp"
android:updatePeriodMillis="500000000">
</appwidget-provider>

从参数名字可以推断出initialLayout是指初始化小部件;minHeightminWidth设置小部件的最小宽高值;对于updatePeriodMillis是定义小部件自动更新的周期,单位为毫秒。

3.定义小部件的实现类。 这部分是实现桌面小部件的核心,所有的操作更新逻辑都是从这里AppWidgetProvider类开始的,首先我们自定义一个类MusicWidgetProvider继承自AppWidgetProvider,并且重写onReceiveonUpdate方法。onReceive方法是接收广播的逻辑,本节开头介绍AppWidgetProvider类时,我们就知道了它继承了BroadcastReceiver所以自热而然的就具有接收广播的能力;onUpdate方法是在小部件每次更新时会回调一次,我们可以在该方法中为子控件指定click监听并触发广播。这样一来就可以在两个方法中形成一个回路从而达到更新自己的效果。具体代码如下:

1
2
3
4
5
6
7
8
9
10
11
12
13
14
15
16
17
18
19
20
21
22
23
24
25
26
27
28
29
30
31
32
33
34
35
36
37
38
39
40
41
42
43
44
45
46
47
48
49
50
51
52
53
54
55
56
57
58
59
60
61
62
63
64
65
66
67
68
69
70
71
72
73
74
75
76
77
78
79
80
81
82
83
84
85
86
87
88
89
90
91
92
93
94
95
96
97
98
99
100
101
102
103
104
105
106
107
108
109
110
111
112
113
114
115
116
117
118
119
120
121
122
123
124
125
126
127
128
129
130
131
132
133
134
135
136
137
138
139
140
141
142
143
144
145
146
147
148
149
150
151
152
153
154
155
156
157
158
159
160
161
162
163
164
165
166
167
168
169
170
171
172
173
174
175
176
177
178
179
180
package com.singuloid.myapplication;
import android.app.PendingIntent;
import android.appwidget.AppWidgetManager;
import android.appwidget.AppWidgetProvider;
import android.content.ComponentName;
import android.content.Context;
import android.content.Intent;
import android.content.SharedPreferences;
import android.os.AsyncTask;
import android.os.Bundle;
import android.util.Log;
import android.widget.RemoteViews;
/**
* Author: doushuqi
* Date: 16-4-28
* Email: shuqi.dou@singuloid.com
* LastUpdateTime:
* LastUpdateBy:
*/
public class MusicWidgetProvider extends AppWidgetProvider {
private static final String TAG = "MusicWidgetProvider";
private static final String SHAREPREFERENCE_NAME = "music";
private static final String SHAREPREFERENCE_KEY_PLAYING = "isplaying";
private static final String SHAREPREFERENCE_KEY_LOVE = "love";
private static final String SHAREPREFERENCE_KEY_PROGRESS = "progress";
private static final String ACTION_MUSIC_PLAY = "com.icedcap.sample.MUSIC_PLAY";
private static final String ACTION_MUSIC_PAUSE = "com.icedcap.sample.MUSIC_PAUSE";
private static final String ACTION_MUSIC_LOVE = "com.icedcap.sample.MUSIC_LOVE";
private MyTask mMyTask;
@Override
public void onReceive(Context context, Intent intent) {
super.onReceive(context, intent);
final String action = intent.getAction();
Log.i(TAG, "action = " + action);
final RemoteViews remoteViews = new RemoteViews(context.getPackageName(), R.layout.music_widget);
if (action.equals(ACTION_MUSIC_PLAY)) {
emulatePlayMusic(context, remoteViews);
} else if (action.equals(ACTION_MUSIC_PAUSE)) {
emulatePauseMusic(context, remoteViews);
} else if (action.equals(ACTION_MUSIC_LOVE)) {
musicLove(context, remoteViews);
AppWidgetManager appWidgetManager = AppWidgetManager.getInstance(context);
appWidgetManager.updateAppWidget(new ComponentName(context, MusicWidgetProvider.class), remoteViews);
}
}
@Override
public void onUpdate(Context context, AppWidgetManager appWidgetManager, int[] appWidgetIds) {
super.onUpdate(context, appWidgetManager, appWidgetIds);
Log.i(TAG, "------onUpdate----------");
final int totalWidgetIds = appWidgetIds.length;
Log.i(TAG, "totalWidgetIds = " + totalWidgetIds);
for (int i = 0; i < totalWidgetIds; i++) {
updateWidget(context, appWidgetManager, appWidgetIds[i]);
}
}
@Override
public void onAppWidgetOptionsChanged(Context context, AppWidgetManager appWidgetManager, int appWidgetId, Bundle newOptions) {
super.onAppWidgetOptionsChanged(context, appWidgetManager, appWidgetId, newOptions);
}
private void updateWidget(Context context, AppWidgetManager manager, int viewId) {
final RemoteViews remoteViews = new RemoteViews(context.getPackageName(), R.layout.music_widget);
final boolean isPlaying = context.getSharedPreferences(SHAREPREFERENCE_NAME, Context.MODE_PRIVATE).getBoolean(SHAREPREFERENCE_KEY_PLAYING, false);
Intent click = new Intent();
// click.setAction(isPlaying ? ACTION_MUSIC_PAUSE : ACTION_MUSIC_PLAY);
if (!isPlaying) {
click.setAction(ACTION_MUSIC_PLAY);
remoteViews.setOnClickPendingIntent(R.id.music_play_pause, PendingIntent.getBroadcast(context, 0, click, 0));
}
click.setAction(ACTION_MUSIC_LOVE);
remoteViews.setOnClickPendingIntent(R.id.music_love, PendingIntent.getBroadcast(context, 0, click, 0));
manager.updateAppWidget(viewId, remoteViews);
}
private void emulatePlayMusic(Context c, RemoteViews remoteViews) {
mMyTask = new MyTask(c, remoteViews);
mMyTask.execute();
}
private void emulatePauseMusic(Context c, RemoteViews r) {
writeIsplayingToSharePreference(c, false);
if (null != mMyTask && !mMyTask.isCancelled()) {
mMyTask.cancel(true);
}
r.setImageViewResource(R.id.music_play_pause, R.drawable.desk2_play);
r.setProgressBar(R.id.music_progress, 100,
c.getSharedPreferences(SHAREPREFERENCE_NAME, Context.MODE_PRIVATE)
.getInt(SHAREPREFERENCE_KEY_PROGRESS, 0), false);
AppWidgetManager appWidgetManager = AppWidgetManager.getInstance(c);
appWidgetManager.updateAppWidget(new ComponentName(c, MusicWidgetProvider.class), r);
}
private void musicLove(Context c, RemoteViews remoteViews) {
boolean isLove = !c.getSharedPreferences(SHAREPREFERENCE_NAME, Context.MODE_PRIVATE).getBoolean(SHAREPREFERENCE_KEY_LOVE, false);
remoteViews.setImageViewResource(R.id.music_love, isLove ? R.drawable.desk_btn_loved : R.drawable.desk_love);
writeLoveToSharePreference(c, isLove);
}
private void writeLoveToSharePreference(Context c, boolean love) {
SharedPreferences.Editor editor = c.getSharedPreferences(SHAREPREFERENCE_NAME, Context.MODE_PRIVATE).edit();
editor.putBoolean(SHAREPREFERENCE_KEY_LOVE, love);
editor.apply();
}
private void writeIsplayingToSharePreference(Context c, boolean play) {
SharedPreferences.Editor editor = c.getSharedPreferences(SHAREPREFERENCE_NAME, Context.MODE_PRIVATE).edit();
editor.putBoolean(SHAREPREFERENCE_KEY_PLAYING, play);
editor.apply();
}
private void writeProgressToSharePreference(Context c, int progress) {
SharedPreferences.Editor editor = c.getSharedPreferences(SHAREPREFERENCE_NAME, Context.MODE_PRIVATE).edit();
editor.putInt(SHAREPREFERENCE_KEY_PROGRESS, progress);
editor.apply();
}
class MyTask extends AsyncTask<Void, Integer, Integer> {
RemoteViews mRemoteViews;
Context mContext;
int mProgress;
public MyTask(Context c, RemoteViews remoteViews) {
mRemoteViews = remoteViews;
mContext = c;
mProgress = c.getSharedPreferences(SHAREPREFERENCE_NAME, Context.MODE_PRIVATE).getInt(SHAREPREFERENCE_KEY_PROGRESS, 0);
}
@Override
protected void onPreExecute() {
writeIsplayingToSharePreference(mContext, true);
mRemoteViews.setImageViewResource(R.id.music_play_pause, R.drawable.desk2_pause);
}
@Override
protected Integer doInBackground(Void... params) {
while (mProgress <= 100) {
try {
Thread.sleep(30);
publishProgress(mProgress);
mProgress += 1;
} catch (InterruptedException e) {
e.printStackTrace();
}
}
return 100;
}
@Override
protected void onProgressUpdate(Integer... values) {
mRemoteViews.setProgressBar(R.id.music_progress, 100, values[0], false);
writeProgressToSharePreference(mContext, values[0]);
AppWidgetManager appWidgetManager = AppWidgetManager.getInstance(mContext);
appWidgetManager.updateAppWidget(new ComponentName(mContext, MusicWidgetProvider.class), mRemoteViews);
}
@Override
protected void onPostExecute(Integer integer) {
writeIsplayingToSharePreference(mContext, false);
mRemoteViews.setProgressBar(R.id.music_progress, 100, 0, false);
mRemoteViews.setImageViewResource(R.id.music_play_pause, R.drawable.desk2_play);
writeProgressToSharePreference(mContext, 0);
AppWidgetManager appWidgetManager = AppWidgetManager.getInstance(mContext);
appWidgetManager.updateAppWidget(new ComponentName(mContext, MusicWidgetProvider.class), mRemoteViews);
}
}
}

4.在AndroidManifes.xml中声明小部件。 因为AppWidgetProvider是一个广播接收者所以要在AndroidManifest中声明

1
2
3
4
5
6
7
8
9
10
11
12
<receiver android:name=".MusicWidgetProvider">
<meta-data
android:name="android.appwidget.provider"
android:resource="@xml/appwidget_provide_info"/>
<intent-filter>
<action android:name="com.icedcap.sample.MUSIC_PLAY"/>
<action android:name="com.icedcap.sample.MUSIC_PAUSE"/>
<action android:name="com.icedcap.sample.MUSIC_LOVE"/>
<action android:name="android.appwidget.action.APPWIDGET_UPDATE"/>
</intent-filter>
</receiver>

对于前三个action我们明白是注册代码中定义的广播,最后一个action则是系统规范必须要这么写。

除此之外,AppWidgetProvide还提供了一些其他重要的覆写方法,具体的调用时机如下表所示:

方法 调用时机
onEnable 当小部件第一次添加到桌面时被调用
onUpdate 小部件被添加时或者每次更新时亦或是在updatePeriodMillis定义的一个周期后也会调用
onDeleted 每次删除(移除)小部件时会调用
onDisabled 当最后一个该类型的桌面小部件移除时会调用

至此,对于RemoteViews的两个实际用途就已经介绍完了,在下节中会探讨RemoteViews的内部机制。

RemoteViews内部机制

通过上节的两个例子可以看出在初始化RemoteViews时会传入两个参数一个是packageName另外一个是layoutId

1
public RemoteViews(String packageName, int layoutId) {...}

packageName是当前应用的包名,而layoutId是待加载的布局文件。由于RemoteViews是在其他进程中显示UI和更新UI的。这样势必就要受到一些限制,例如在上节中实践过的,不能通过findViewById等普通View所具有的方法。除此之外,RemoteViews不能支持全部的View子类,它仅支持如下类型:

  • ViewGroup
    • FrameLayout
    • LinearLayout
    • RelativeLayout
    • GridLayout
  • View
    • AnalogClock
    • Button
    • Chronometer
    • ImageButton
    • ImageView
    • ProgressBar
    • TextView
    • ViewFlipper
    • ListView
    • GridView
    • StackView
    • AdapterViewFlipper
    • ViewStub

对于上述View的子类型RemoteViews是不支持的,对于自定义的View和android.widget.EditText也都是不允许在RemoteViews中使用的。

RemoteViews原理简述

从第一部分的两个例子的实践来看RemoteViews的更新是通过setxxx的方法完成的。事实上,这些set方法是通过反射来实现的。

对于自定义通知栏和桌面小部件二者是通过NotificationManagerAppWidgetManager来管理的,而它们又是通过Binder分别和SystemServer进程中的NotificationManagerServiceAppWidgetService进行通信的,由此可见RemoteViews的加载与更新是在SystemServer中完成的。因此RemoteViews必须具备跨进程间通信等特征,如实现Parcelable接口。

这时候也就明白了RemoteViews构造方法中传入包名的目的就是为了在SystemServer进程中加载该应用的资源,然后通过LayoutInflater去加载RemoteViews中的布局文件。这时候在远程就完成了RemoteViews的加载过程。

回到本地,当一系列事件后需要更新RemoteViews的时候。会通过set的反射方法进行更新。从理论上View的所有方法都是可以通过Binder进行传递从而到达SystemServer进行更新的,但是这样难免带来额外的开销,造成界面的卡顿而得不偿失。这时候我们引入Action对象,它同样实现了Parcelable接口,可以IPC进行传递。把对View的每一步操作封装到Action中,然后通过NotificationManagerAppWidgetManager来提交,这样就通过Binder将Action传递到SystemServer进程中。到了SystemServer进程就可以通过RemoteViewsapplyreapply进行更新了。

以上就是RemoteViews的工作原理,下面通过代码可以细细品味一下。

源码分析

这一节我们分两条线进行切入首先从API调用开始再次通过AppWidgetManager进行更新操作进行代码跟进,这两条线应该有一个汇聚。首先这里我们选取setTextViewText方法进行切入。

1
2
3
4
5
6
7
public void setTextViewText(int viewId, CharSequence text) {
setCharSequence(viewId, "setText", text);
}
public void setCharSequence(int viewId, String methodName, CharSequence value) {
addAction(new ReflectionAction(viewId, methodName, ReflectionAction.CHAR_SEQUENCE, value));
}

上述代码没得说,这里我们来具体观察下addActionRelfectionAction

1
2
3
4
5
6
7
8
9
10
11
12
13
14
private void addAction(Action a) {
if (hasLandscapeAndPortraitLayouts()) {
throw new RuntimeException("RemoteViews specifying separate landscape and portrait" +
" layouts cannot be modified. Instead, fully configure the landscape and" +
" portrait layouts individually before constructing the combined layout.");
}
if (mActions == null) {
mActions = new ArrayList<Action>();
}
mActions.add(a);
// update the memory usage stats
a.updateMemoryUsageEstimate(mMemoryUsageCounter);
}

RemoteViews维护着mAction的全局变量,每次进行更新操作的时候都会将一个Action添加进去,然后就没有然后了(这里仅仅是保存在了mAction中,我们不知道谁去将它进行实质性的操作)。下面再看看RelfectionAction

1
2
3
4
5
6
7
8
9
10
11
12
13
14
15
16
17
18
19
20
21
22
23
24
25
26
27
28
29
30
31
32
33
34
35
36
37
38
39
private final class ReflectionAction extends Action {
static final int TAG = 2;
...
String methodName;
int type;
Object value;
ReflectionAction(int viewId, String methodName, int type, Object value) {
this.viewId = viewId;
this.methodName = methodName;
this.type = type;
this.value = value;
}
....
@Override
public void apply(View root, ViewGroup rootParent, OnClickHandler handler) {
final View view = root.findViewById(viewId);
if (view == null) return;
Class<?> param = getParameterType();
if (param == null) {
throw new ActionException("bad type: " + this.type);
}
try {
getMethod(view, this.methodName, param).invoke(view, wrapArg(this.value));
} catch (ActionException e) {
throw e;
} catch (Exception ex) {
throw new ActionException(ex);
}
}
...
}

ReflectionAction中封装了viewIdmethodNametype以及value并且重写了apply方法。至今我们还不知道这个apply的作用,没关系,我们看一看RemoteViews中的performApply方法做了些什么。

1
2
3
4
5
6
7
8
9
10
private void performApply(View v, ViewGroup parent, OnClickHandler handler) {
if (mActions != null) {
handler = handler == null ? DEFAULT_ON_CLICK_HANDLER : handler;
final int count = mActions.size();
for (int i = 0; i < count; i++) {
Action a = mActions.get(i);
a.apply(v, parent, handler);
}
}
}

很明显更新操作是从这里发出的(当然这是我们假设的因为还没有去验证,如果验证的话就得从NotificationManagerAppWidgetManager中找调用该方法的代码了,这也正是即将进行跟进分析的第二条线)遍历每一次的更新并调用Actionapply方法。这时候再往回看RelfectionActionapply方法,正是通过反射机制来实现View的操作的。

这时候我们的setTextViewText方法实现原理就了然于胸了,其他方法大致过程亦如此,这里不再赘述。

下面我们来看第二条线,从正面切入,就拿桌面小部件例子来看,每次更新RemoteViews都是从AppWidgetManager.updateAppWidget方法开始的。

1
2
3
4
5
6
7
8
9
10
11
12
13
14
15
16
17
18
19
20
21
22
23
24
25
26
27
28
29
30
public void updateAppWidget(int appWidgetId, RemoteViews views) {
if (mService == null) {
return;
}
updateAppWidget(new int[] { appWidgetId }, views);
}
public void updateAppWidget(int[] appWidgetIds, RemoteViews views) {
if (mService == null) {
return;
}
try {
mService.updateAppWidgetIds(mPackageName, appWidgetIds, views);
}
catch (RemoteException e) {
throw new RuntimeException("system server dead?", e);
}
}
public void updateAppWidget(ComponentName provider, RemoteViews views) {
if (mService == null) {
return;
}
try {
mService.updateAppWidgetProvider(provider, views);
}
catch (RemoteException e) {
throw new RuntimeException("system server dead?", e);
}
}

上述三种重载方法都是更新RemoteViews的方法,接下来再看mService.updateAppWidgetProvider方法,mService是一个远程接口IAppWidgetService。代码跟到这就要进行IPC,故我们找到远程服务所对应的updateAppWidgetProvider方法。该方法位于源码目录:frameworks/base/services/appwidget/java/com/android/server/appwidget/AppWidgetServiceImpl.java

1
2
3
4
5
6
7
8
9
10
11
12
13
14
15
16
17
18
19
20
21
22
23
24
25
26
27
28
29
30
31
32
@Override
public void updateAppWidgetProvider(ComponentName componentName, RemoteViews views) {
final int userId = UserHandle.getCallingUserId();
if (DEBUG) {
Slog.i(TAG, "updateAppWidgetProvider() " + userId);
}
// Make sure the package runs under the caller uid.
mSecurityPolicy.enforceCallFromPackage(componentName.getPackageName());
synchronized (mLock) {
ensureGroupStateLoadedLocked(userId);
// NOTE: The lookup is enforcing security across users by making
// sure the caller can access only its providers.
ProviderId providerId = new ProviderId(Binder.getCallingUid(), componentName);
Provider provider = lookupProviderLocked(providerId);
if (provider == null) {
Slog.w(TAG, "Provider doesn't exist " + providerId);
return;
}
ArrayList<Widget> instances = provider.widgets;
final int N = instances.size();
for (int i = 0; i < N; i++) {
Widget widget = instances.get(i);
updateAppWidgetInstanceLocked(widget, views, false);
}
}
}
1
2
3
4
5
6
7
8
9
10
11
12
13
14
15
16
private void updateAppWidgetInstanceLocked(Widget widget, RemoteViews views,
boolean isPartialUpdate) {
if (widget != null && widget.provider != null
&& !widget.provider.zombie && !widget.host.zombie) {
if (isPartialUpdate && widget.views != null) {
// For a partial update, we merge the new RemoteViews with the old.
widget.views.mergeRemoteViews(views);
} else {
// For a full update we replace the RemoteViews completely.
widget.views = views;
}
scheduleNotifyUpdateAppWidgetLocked(widget, views);
}
}

代码读到这里,我们发现从本地传进来的RemoteViews对象被赋予了远程进程中的widget.views并且调用scheduleNotifyUpdateAppWidgetLocked方法,接下来再看看该方法

1
2
3
4
5
6
7
8
9
10
11
12
13
14
15
16
private void scheduleNotifyUpdateAppWidgetLocked(Widget widget, RemoteViews updateViews) {
if (widget == null || widget.provider == null || widget.provider.zombie
|| widget.host.callbacks == null || widget.host.zombie) {
return;
}
SomeArgs args = SomeArgs.obtain();
args.arg1 = widget.host;
args.arg2 = widget.host.callbacks;
args.arg3 = updateViews;
args.argi1 = widget.appWidgetId;
mCallbackHandler.obtainMessage(
CallbackHandler.MSG_NOTIFY_UPDATE_APP_WIDGET,
args).sendToTarget();
}

好吧,又拐弯了!

1
2
3
4
5
6
7
8
9
10
11
12
13
14
15
16
17
18
19
20
21
22
23
24
25
26
27
28
29
30
31
32
33
34
35
36
37
38
39
40
41
42
43
44
45
46
47
48
49
50
51
52
53
54
55
56
57
private final class CallbackHandler extends Handler {
public static final int MSG_NOTIFY_UPDATE_APP_WIDGET = 1;
public static final int MSG_NOTIFY_PROVIDER_CHANGED = 2;
public static final int MSG_NOTIFY_PROVIDERS_CHANGED = 3;
public static final int MSG_NOTIFY_VIEW_DATA_CHANGED = 4;
public CallbackHandler(Looper looper) {
super(looper, null, false);
}
@Override
public void handleMessage(Message message) {
switch (message.what) {
case MSG_NOTIFY_UPDATE_APP_WIDGET: {
SomeArgs args = (SomeArgs) message.obj;
Host host = (Host) args.arg1;
IAppWidgetHost callbacks = (IAppWidgetHost) args.arg2;
RemoteViews views = (RemoteViews) args.arg3;
final int appWidgetId = args.argi1;
args.recycle();
handleNotifyUpdateAppWidget(host, callbacks, appWidgetId, views);
} break;
case MSG_NOTIFY_PROVIDER_CHANGED: {
SomeArgs args = (SomeArgs) message.obj;
Host host = (Host) args.arg1;
IAppWidgetHost callbacks = (IAppWidgetHost) args.arg2;
AppWidgetProviderInfo info = (AppWidgetProviderInfo)args.arg3;
final int appWidgetId = args.argi1;
args.recycle();
handleNotifyProviderChanged(host, callbacks, appWidgetId, info);
} break;
case MSG_NOTIFY_PROVIDERS_CHANGED: {
SomeArgs args = (SomeArgs) message.obj;
Host host = (Host) args.arg1;
IAppWidgetHost callbacks = (IAppWidgetHost) args.arg2;
args.recycle();
handleNotifyProvidersChanged(host, callbacks);
} break;
case MSG_NOTIFY_VIEW_DATA_CHANGED: {
SomeArgs args = (SomeArgs) message.obj;
Host host = (Host) args.arg1;
IAppWidgetHost callbacks = (IAppWidgetHost) args.arg2;
final int appWidgetId = args.argi1;
final int viewId = args.argi2;
args.recycle();
handleNotifyAppWidgetViewDataChanged(host, callbacks, appWidgetId, viewId);
} break;
}
}
}

沿着这条线继续!

1
2
3
4
5
6
7
8
9
10
11
private void handleNotifyUpdateAppWidget(Host host, IAppWidgetHost callbacks,
int appWidgetId, RemoteViews views) {
try {
callbacks.updateAppWidget(appWidgetId, views);
} catch (RemoteException re) {
synchronized (mLock) {
Slog.e(TAG, "Widget host dead: " + host.id, re);
host.callbacks = null;
}
}
}

终于的终于,找到了更新RemoteViews真正的类和方法callbacks.updateAppWidget(appWidgetId, views),看到IAppWidgetHost又是一个远程接口,我们找到实现它的远程服务AppWidgetHost.Callbacks

1
2
3
4
5
6
7
8
9
10
11
12
13
14
15
16
17
18
19
20
21
22
23
24
25
26
27
28
class Callbacks extends IAppWidgetHost.Stub {
public void updateAppWidget(int appWidgetId, RemoteViews views) {
if (isLocalBinder() && views != null) {
views = views.clone();
}
Message msg = mHandler.obtainMessage(HANDLE_UPDATE, appWidgetId, 0, views);
msg.sendToTarget();
}
public void providerChanged(int appWidgetId, AppWidgetProviderInfo info) {
if (isLocalBinder() && info != null) {
info = info.clone();
}
Message msg = mHandler.obtainMessage(HANDLE_PROVIDER_CHANGED,
appWidgetId, 0, info);
msg.sendToTarget();
}
public void providersChanged() {
mHandler.obtainMessage(HANDLE_PROVIDERS_CHANGED).sendToTarget();
}
public void viewDataChanged(int appWidgetId, int viewId) {
Message msg = mHandler.obtainMessage(HANDLE_VIEW_DATA_CHANGED,
appWidgetId, viewId);
msg.sendToTarget();
}
}

这里将Remoteviews克隆了一份赋予views并且通过Handler转发,我们看一下转发后的具体操作

1
2
3
4
5
6
7
8
9
10
11
12
13
14
15
16
17
18
19
20
21
22
23
24
25
26
27
28
29
30
31
32
33
34
35
36
class UpdateHandler extends Handler {
public UpdateHandler(Looper looper) {
super(looper);
}
public void handleMessage(Message msg) {
switch (msg.what) {
case HANDLE_UPDATE: {
updateAppWidgetView(msg.arg1, (RemoteViews)msg.obj);
break;
}
case HANDLE_PROVIDER_CHANGED: {
onProviderChanged(msg.arg1, (AppWidgetProviderInfo)msg.obj);
break;
}
case HANDLE_PROVIDERS_CHANGED: {
onProvidersChanged();
break;
}
case HANDLE_VIEW_DATA_CHANGED: {
viewDataChanged(msg.arg1, msg.arg2);
break;
}
}
}
}
void updateAppWidgetView(int appWidgetId, RemoteViews views) {
AppWidgetHostView v;
synchronized (mViews) {
v = mViews.get(appWidgetId);
}
if (v != null) {
v.updateAppWidget(views);
}
}

这里出现了AppWidgetHostView类,估计它就是最终的操作类了。

1
2
3
4
5
6
7
8
9
10
11
12
13
14
15
16
17
18
19
20
21
22
23
24
25
26
27
28
29
30
31
32
33
34
35
36
37
38
39
40
41
42
43
44
45
46
47
48
49
50
51
52
53
54
55
56
57
58
59
60
61
62
63
64
65
66
67
68
69
70
71
72
73
74
75
76
77
78
79
80
81
82
83
84
85
86
87
88
89
90
91
92
93
94
95
96
97
98
public void updateAppWidget(RemoteViews remoteViews) {
if (LOGD) Log.d(TAG, "updateAppWidget called mOld=" + mOld);
boolean recycled = false;
View content = null;
Exception exception = null;
// Capture the old view into a bitmap so we can do the crossfade.
if (CROSSFADE) {
if (mFadeStartTime < 0) {
if (mView != null) {
final int width = mView.getWidth();
final int height = mView.getHeight();
try {
mOld = Bitmap.createBitmap(width, height, Bitmap.Config.ARGB_8888);
} catch (OutOfMemoryError e) {
// we just won't do the fade
mOld = null;
}
if (mOld != null) {
//mView.drawIntoBitmap(mOld);
}
}
}
}
if (remoteViews == null) {
if (mViewMode == VIEW_MODE_DEFAULT) {
// We've already done this -- nothing to do.
return;
}
content = getDefaultView();
mLayoutId = -1;
mViewMode = VIEW_MODE_DEFAULT;
} else {
// Prepare a local reference to the remote Context so we're ready to
// inflate any requested LayoutParams.
mRemoteContext = getRemoteContext();
int layoutId = remoteViews.getLayoutId();
// If our stale view has been prepared to match active, and the new
// layout matches, try recycling it
if (content == null && layoutId == mLayoutId) {
try {
remoteViews.reapply(mContext, mView, mOnClickHandler);
content = mView;
recycled = true;
if (LOGD) Log.d(TAG, "was able to recycled existing layout");
} catch (RuntimeException e) {
exception = e;
}
}
// Try normal RemoteView inflation
if (content == null) {
try {
content = remoteViews.apply(mContext, this, mOnClickHandler);
if (LOGD) Log.d(TAG, "had to inflate new layout");
} catch (RuntimeException e) {
exception = e;
}
}
mLayoutId = layoutId;
mViewMode = VIEW_MODE_CONTENT;
}
if (content == null) {
if (mViewMode == VIEW_MODE_ERROR) {
// We've already done this -- nothing to do.
return ;
}
Log.w(TAG, "updateAppWidget couldn't find any view, using error view", exception);
content = getErrorView();
mViewMode = VIEW_MODE_ERROR;
}
if (!recycled) {
prepareView(content);
addView(content);
}
if (mView != content) {
removeView(mView);
mView = content;
}
if (CROSSFADE) {
if (mFadeStartTime < 0) {
// if there is already an animation in progress, don't do anything --
// the new view will pop in on top of the old one during the cross fade,
// and that looks okay.
mFadeStartTime = SystemClock.uptimeMillis();
invalidate();
}
}
}

好了终于明了了,首先通过layoutId来匹配是否来自同一个RemoteViews如果匹配上则说明此次是更新操作否则就是第一次调用该方法即第一次来填充RemoteViews视图,在这两种条件下我们分别对应调用RemoteViewsreapplyapply方法来更新和填充RemoteViews。现在已经真相大白了,也验证了我们之前的假设在apply加载在reapply中进行更新。

通过从API操作和Manager正面更新两条线的代码跟进分析,我们已经熟悉了RemoteViews的工作原理,相对来说还是比较简单的,但它的思想是值得学习的,小小的RemoteViews机制也构成了复杂的Android框架的一部分,它运用了java反射机制、IPC本地与远程进程间的通信、并且多次使用Handler进行Message转发操作等一些关键的知识点,这些都是值得每一个开发者熟练掌握并运用。

本文源码demo托管在本人的Github仓库中,感兴趣的可以下载查看